Generating images of animals in their environment can be done in two ways; by using a wide-angle lens from very close to your subject or by using a telephoto lens (zoomed to between 100mm and 500mm) and keeping a large distance from your subject.
In both cases, you will include large amounts of the habitat and create an image where the subject has a place in its surroundings…an image which tells a story of the animal’s niche in the world.
The benefit of the latter option – using a telephoto lens – is that you don’t have to get very close to your subject, which is not always possible on safari. However, you do have to ‘look’ further afield, as animal-scape situations commonly materialise in the distance, and you have to be ready for them. The following image was taken at a distance of about 300m from the leopard. Yes, we would like to get closer to the leopard, but while she was further away, we could take shots of her in her environment, including when she was scenting and then scent-marking this fallen tree.
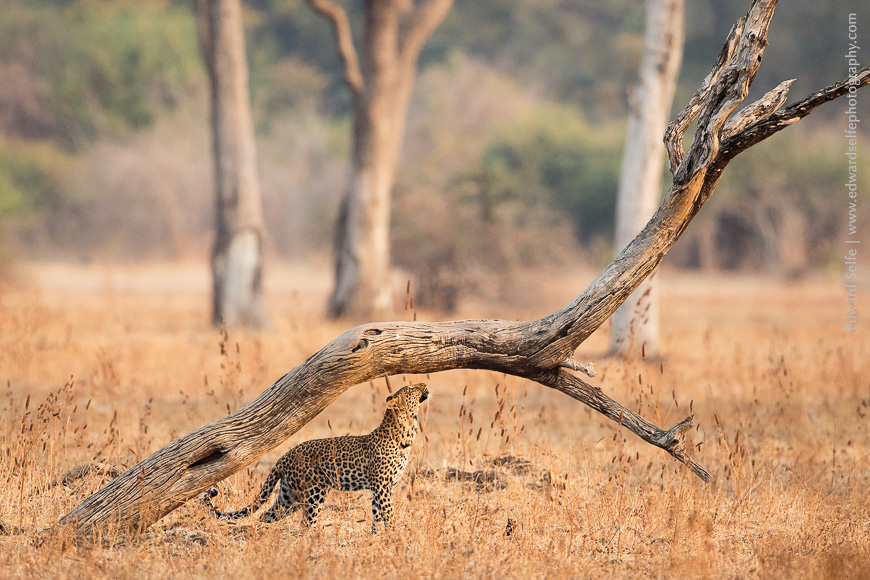
As my caption above suggests, animalscapes are as much about the shape and composition of the surroundings as they are of the animal subject. The leopard image above works well because the fallen tree is an interesting shape in its own right. The light is good, giving shape to the trees, and the leopard fits neatly into the space below the trunk.
In this elephant photo, it is the surroundings that make the shot once again. The bands of light and dark sand, with shiny water in between, make for an interesting composition on their own. The position of the elephant is carefully chosen to balance the dark bottom-left section of the image.
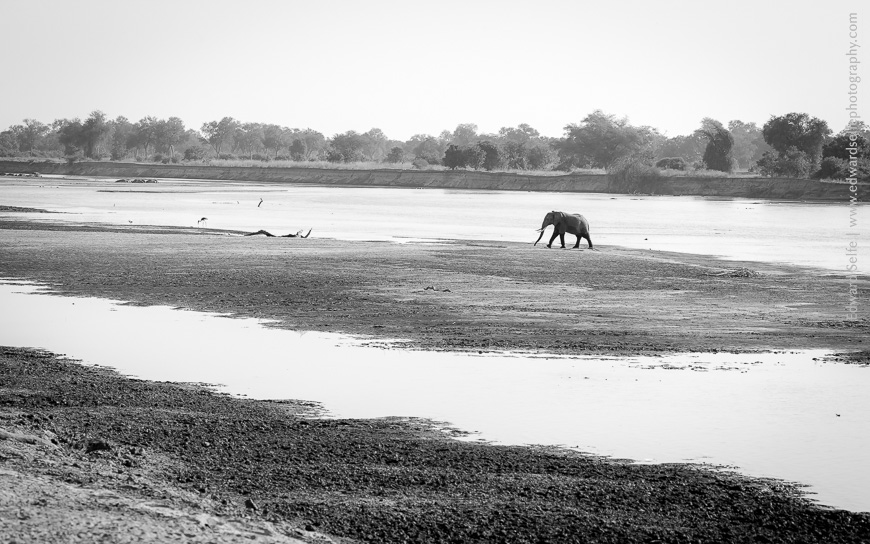
So how do we get animalscape images in the bush? The key is to start thinking about the habitat as a subject in itself and the animals as a shape in the surroundings. Particularly with Africa’s iconic species – which are so recognisable, even by their shape – it’s not necessary to approach close. Keeping back, and choosing to position yourself with the whole scene in mind (rather than just the subject) will quickly give you great results.
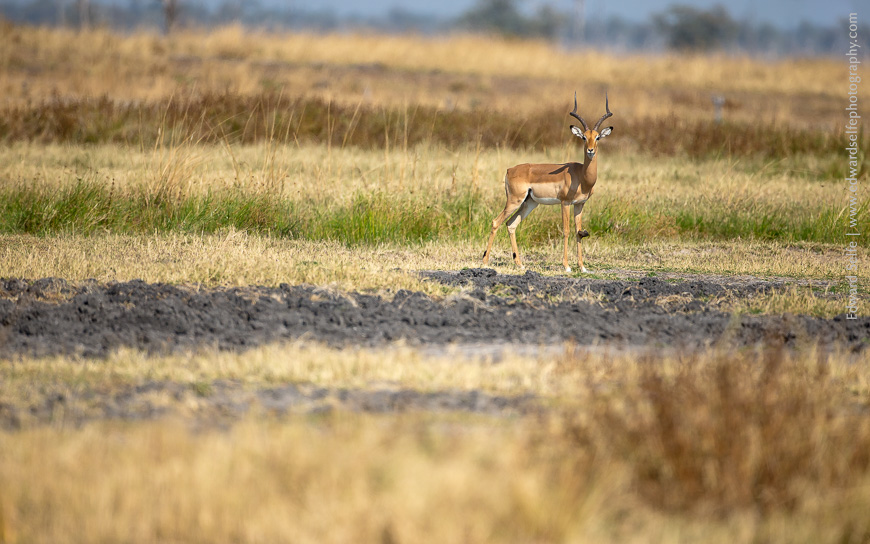
This technique can also be useful when it’s not possible to get close to your subject, either because they are very shy or because they’re inaccessible. One of my favourite animalscapes is the Eland photo below. Eland are incredibly shy and I only managed to get to roughly 500m range before he ran for cover. But I was able to make a pleasing shot by considering how it looked against the surroundings. I could see that the trees behind were more pleasing than the ground below, so I shifted the frame upwards to cut out the foreground. I could also see that the trees either side of the subject made convenient book-ends for my shot, so I shifted the frame until they were arranged at either side of the image.
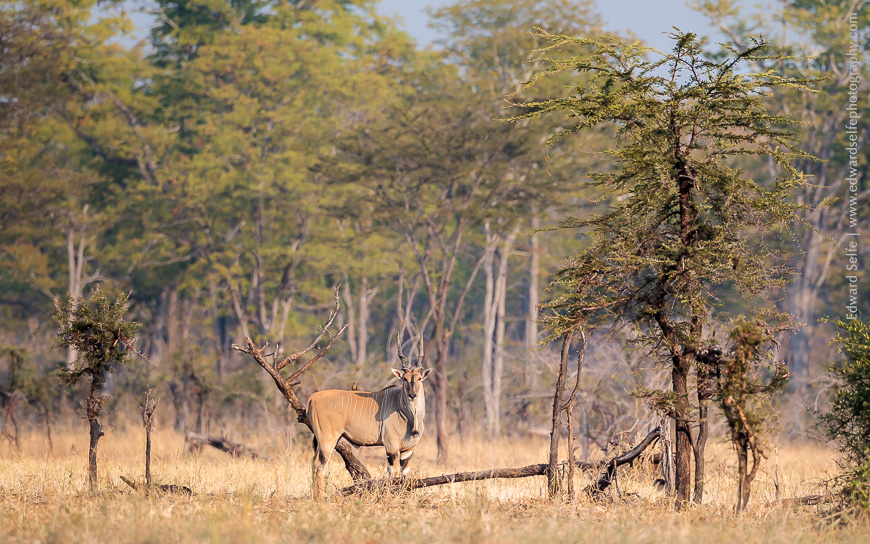
Another benefit of keeping your distance from your subject, and shooting with a long lens is that your ‘angle of view’ is more flattering. In other words, you are looking horizontally at your subject, rather than down on it, as you do if you are very close. The benefit of this is that the background to your subject is the landscape behind it, rather than the ground below it – this gives a much more natural effect.
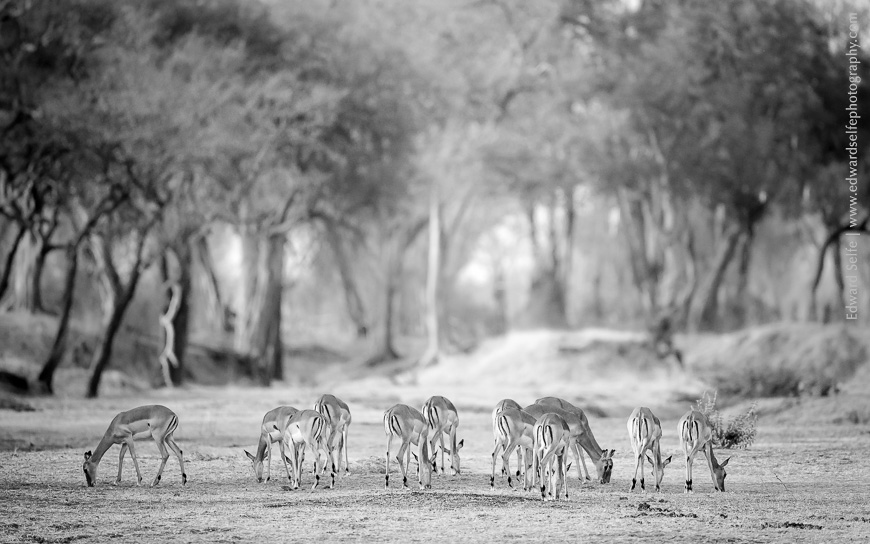
In the image above, the herd of impalas are feeding with their heads down. Ths would not normally make an interesting photo! But the soft side-light and particularly the tunnel of trees in the background make the image into something special. Had we driven closer, we would have lost the chance to have the trees in the background of the shot – the higher ‘angle of view’ would have meant that the grassland would have made up most of the background.
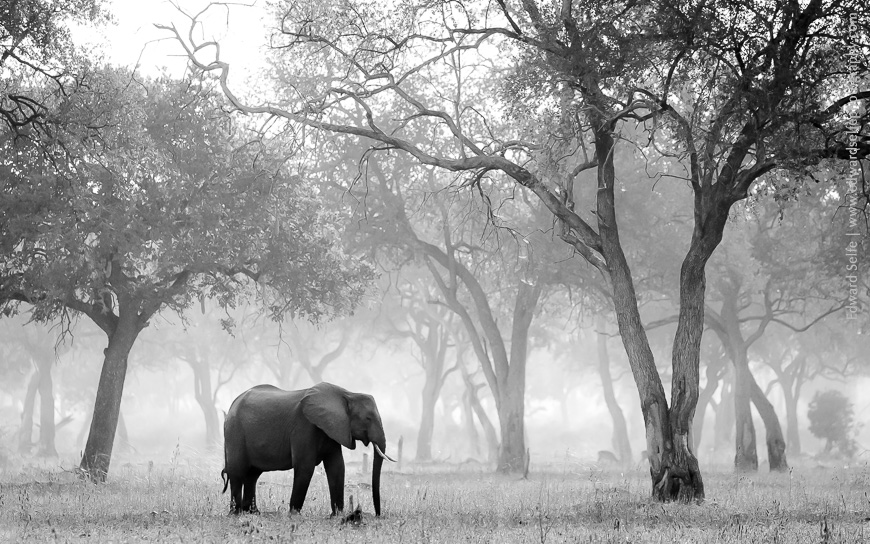
This elephant image was a long time in the making. We found the a herd and hoped to photograph them in morning light with the trees behind. For almost 30 minutes, they kept their backs to us, huddled in a bunch, and gave us no chances! Such is wildlife. But finally, the cow broke away from the group and wandered away, allowing us to work with the shape of single elephant. By this time, the light was not as flattering as it had been (!) so I suggested to ‘think in black & white’, looking for shapes and tones, rather than colour. I moved the vehicle until I saw a composition materialising and waited for her to move into it. Here, the large tree on the right hand side of the image balances the elephant, and the smaller trees in the background provide interest without distracting. Crucially, the elephant’s shape is clear and unbroken – a tree close behind her would break her silhouette and disrupt the shot.
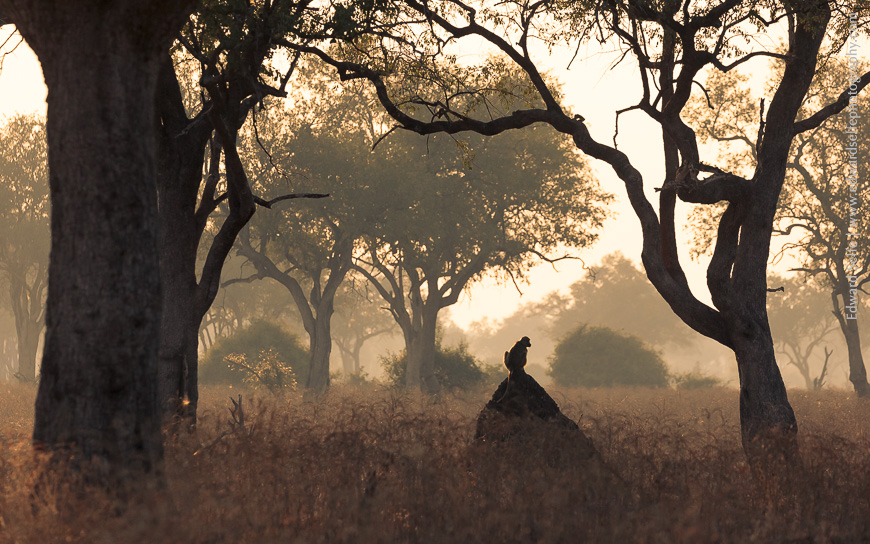
This is my favourite animalscape of the year, and one of my favourite shots of all. The baboon is perhaps only 1% of the frame, but is immediately identifiable and recognisable (is that our primate instinct?). The two large trees provide a clear and balanced frame, and the trees behind complement the image and block most of the bright sky. Where the sky does appear, it is bright and washed out, but it forms a line pointing downwards towards the baboon who is resting on the beautifully-shaped termite mound. The baboon’s shape is unbroken by the bushes behind and – for just a second – he turns to look at the camera.
Making something unusual from the commonplace is what we strive to do on photo safaris in the Luangwa. I love this animalscapes technique and love to share these ideas with my guests and help them make interesting images of their own. One of the most rewarding results of this technique is that everyone creates different images, even though we are sitting in the same spot!
Remember: keep your distance, compose carefully, excluding anything that doesn’t complement your image, and look for the shapes and tones in the image. Your subject is often just a shape too, so consider how that fits into the overall scene. I hope you enjoyed reading this post – go out and try animalscapes! Good luck!

