In a recent blog, I discussed the value of considering the background when positioning yourself for wildlife photography. Equally important to consider is the angle of the light. Sometimes the best position for the angle of the light and the best position for the background do not coincide and, in brief, that is why not all wildlife photography scenarios yield award-winning images! It is rare that we can coincide light, background, behaviour and angle of view at the precise moment of the best action. But the pursuit of such images is what keeps photographers going out each day with the hope of catching that moment. The pursuit is addictive.
Generally it’s a safe bet to put the light behind you when you shoot. It gives you the best chance of focusing accurately, it avoids bright light and harsh shadows across your subject and it makes observing the behaviour easiest. However, the problem with this approach appears when the subject and the background are equally and smoothly lit by the same light source. This leads to flat images where there is little separation between your subject and background.

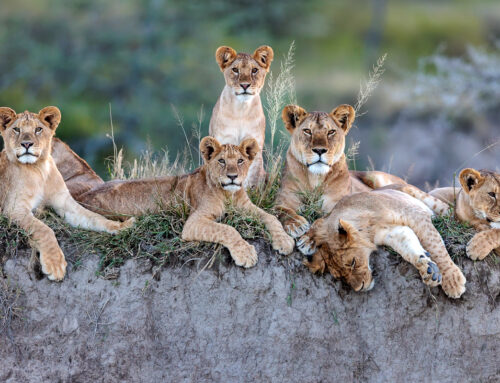
Take this lovely image of lion cubs playing. There lots to be happy about; the image is sharp, there is one eye visible and the action is great, with enough shutter speed to freeze the moment. But the lions are almost the same colour and tone as the muddy earth behind them. It’s only the shadow depth of field generated by the telephoto lens the separates them from their surroundings.
As a photographer, I would immediately look for a better position to photograph these lions. Clearly I can’t ask the lions to move off the brown earth, so I need to move myself to a position where I can shoot with a different light angle and/or background. I covered the discussion about backgrounds in the recent post, so this blog considers the light angle and particularly the idea of shooting towards the light.
In my mind, shooting towards the light creates images of three genres: silhouettes, backlit images and hazy images. All three require slightly different set up and considerations, and yield different results.
Taking each in turn.
- Shooting towards the light to create hazy images:
To create such images, you position yourself so the light source – let’s just say the sun – is in front of you, and your subject is between you and the sun. Your subject will be lit from behind it (hence the name backlit) and you will see the shady/shadow side of the subject. The areas of the subject which are lit will be away from you, with the exception of the ‘edges’ of the subject. In animals which have ‘fluffy’ coats, this can reveal a very nice golden halo around your subject.

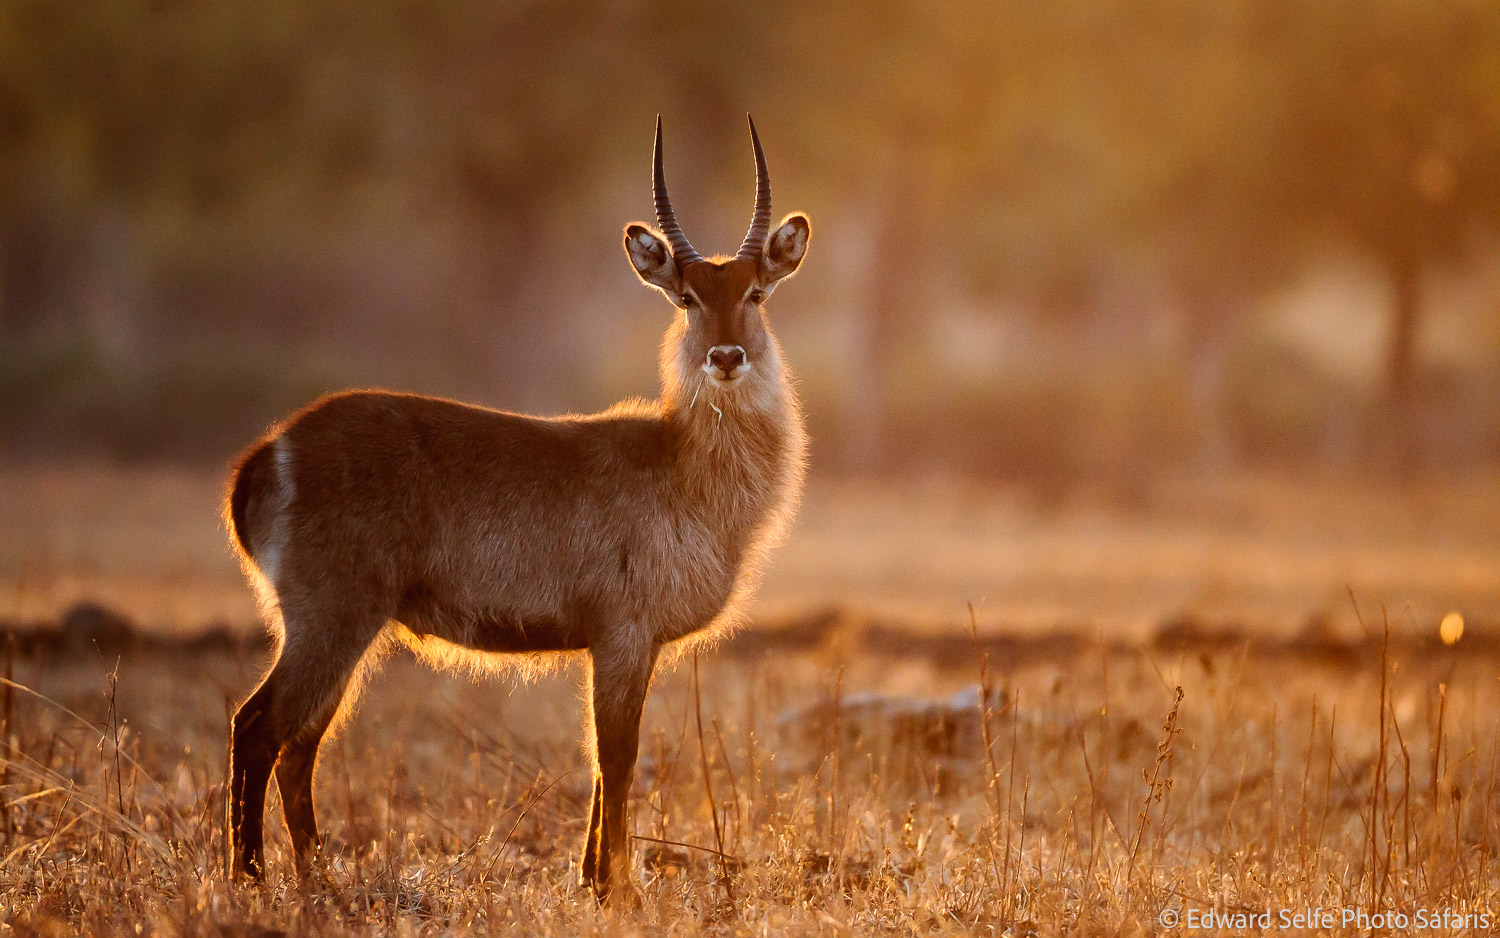
The title slide for this blog is a great example of this technique; I am shooting towards the light with the waterbuck lit from behind. The flank of the waterbuck is dark and there is a strong halo around it lit up by the sun.

This image of impalas, taken earlier in the season when the light was stronger, shows how shooting into the light can help to separate a subject from its background. The impalas are actually quite dark, and immediately catch the viewer’s eye. The diffused background does not distract from the subject. Had I shot with the light behind me, the impalas and the background would have had the same tone and colour and the image would have had far less impact.

It’s worth noting in these examples that care must be taken with the background to ensure that there aren’t distracting objects behind the subject. In the same way that the subjects are darker than normal — because we are looking at the shady side of them — so too are trees, bushes and other objects and they form harsh, dark lumps which are not helpful in your image. There are a couple of stumps in the right side of the image which are not ideal, but do not distract too heavily from the subjects.

Care should also be taken with focus as you are asking your camera to latch onto the darker, unlit side of the animal where there is less detail….and the background contains a lot of brightly lit, high contrast items that the AF system will gladly choose instead of your subject!

Finding items to add to your image, like these grass seed-heads can add a brilliant quality to your images. In this case the grasses were tall so we needed to maintain height to place them against the zebras, but if you have shorter grass, get lower and you can achieve the same effect.

Finally, if you can get the sun to bleed into the back of your shot, you can introduce flare. Not everyone agrees with this technique, but I like it, especially if the subject is still very defined.
These hazy, backlit images are a great way to introduce a more interesting lighting set up to your images; I use the method all the time and in fact I prefer to shoot towards the light when I have a choice, especially when the light is low or soft.
2. Backlit Images
To take this technique a step further, you have to think about finding a background that is darker than the subject. If you can pair a backlit image with a dark background, you can create some incredible images.

In this image of a Crawshay’s zebra from South Luangwa, I chose to stop the vehicle in a place where the dark shrubs behind the subject helped to lift the paler zebra out of the surrounding bushes. The effect is successful and the habitat of the zebra is maintained but the scrubby bushes are hidden by the backlit effect. The redness comes from the very early morning sun which is just out of shot to the top right.

On a very hazy day in October, I drove down into a gully to place these Puku against the distant line of bushes beyond. Had I been higher, the grassland would have risen into the background, and any lower would have placed the Puku agains the washed out sky. Here, the placement of the background was crucial to creating the shot.

But, unlike the hazy light above, best of all is when we can combine strong light from behind the subject with a background that renders the rest of the image into a dark canvas. In this case, the lions were resting in the sand and were warming up in the early sunshine. The sun was strong, but had not yet illuminated the bushes behind the lions. Choosing an exposure compensation of -2 I was able to darken the whole image but leave the strongly-lit halo of fluffy hair around the lions showing. To improve the image, I would have had to get even lower (to eradicate the bright sand) but that was not possible in the circumstances.

Better is this shot of two baboons warming up on a fallen tree. Due to the fact that they are raised up off the ground, we do not have the problem of the bright sand in the image above. Again, an exposure of -2 1/3 was used.

Once you master the concept, and know how to line up the light, the subject and the background, this technique is a brilliant way to add diversity to a portfolio. It works best with animals that are hairy (so that there is a distinct halo) and which have a distinctive shape. The subject must also be sitting in a way that its shape is apparent – e.g. side on in the case of baboons to show the distinctive head shape.

This is perhaps one of my favourites. An example of where it all came together.

Even though it was on the ground, this worked well because the light was hitting the far side of the small rise in the ground and not the areas that are visible. The illuminated shrubs in the foreground only add to the effect.

This one was nearly perfect. Despite my attempts to get lower in the vehicle, I wasn’t able to raise the cubs up into the dark background of the trees behind. Nevertheless, the effect is still strong and the impact of this image is better due to the interesting and unusual lighting set up.

It works well with birds too, especially when there is enough light for the bare parts like the bill to be illuminated and become translucent.
The final option for shooting into the light is to create silhouette shots. This takes precise set-up and areas, like Zambia, which have a lot of trees are not famous for this technique. But it can be done in some cases. The key to good silhouette shots is to start with a clearly defined subject shape, paired with a great perch/habitat/surroundings which are free of clutter and will make a strong composition. The addition of a colourful sky, or a sky filled with interesting clouds, adds significantly to the effect, compared to a white, blue or washed out sky.
3. Silhouettes

The plains of Busanga in northern Kafue are one area that silhouettes can be reliably set up. I love this shot of a red lechwe at dawn with the sun in the background. The mist helps to separate the subject from the background and the lechwe’s upright stance is crucial in making an image where the antelope (not the bright sun) is the first thing that your eye sees.

In the same theme, from the same area, this image is strong because the background is entirely clear of any distractions.

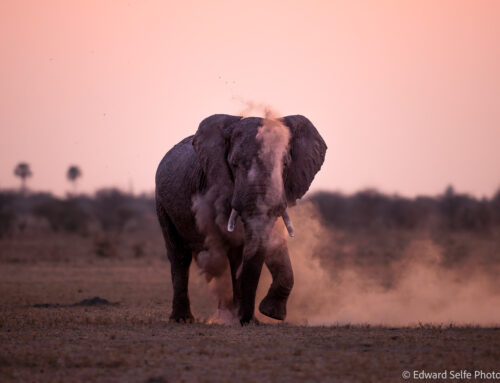
Rather than mist, it was dust that created the colour and separation in this image. I chose an exposure compensation of -1 in this image to make sure that the lightest parts of the dusty sky were not blown out and knowing that the dark elephant shapes would be entirely black anyway. I chose this image from the sequence because of the position of the legs of the elephants which show movement across the frame.

A more classic silhouette shot, take at last light in South Luangwa at -2 exposure compensation. Not only does the -2 EC maintain the rich colours, it also ‘buys’ extra shutter speed and/or lower ISO to create the shot. The branch is clean and free of gnarls and stumps and the foliage in the top left hints at the canopy above where the baboon will roost for the night.
This is a situation when careful focus is required as the subject has no detail to grip onto. I placed the focus point over the baboon’s head and the AF system caught the fluffy hair around its face and chest, giving me a sharp image.

But it’s also true that all rules can be broken too…. This image is part silhouette, part backlit halo shot…and contains the sun as well. So it’s a mix of all three techniques above. Always good to experiment too!
Thank you for following through this discussion about shooting into the light. It’s a technique that I use regularly to help separate a subject from the background and to broaden my portfolio of images from a safari. It’s also helpful when the subject and background are similar colours and tones…..as is often the case in dry-season Africa.
Leave A Comment