Silhouette images – in which the subject is defined mostly or entirely by its shape – convey huge visual impact if they are created successfully. Certain elements are important in creating this impact: the subject should be recognisable by its shape; the subject’s shape should ideally be clear and “unbroken” by other elements in the image; the background against which the subject is shown should enhance the shot, ideally having its own value and interest.
The images that immediately come to mind are of dark (or black) silhouettes against a sunset sky, or against water, or simply against the blue sky. These are all great situations in which to employ the silhouette technique, but there are others too, as we will see below.
Before we move on to examples, though, how do we create a silhouette shot? Firstly, spot your opportunity: is your subject in a suitable location for a silhouette? Perhaps sitting on top of a river bank, with the water behind, or perched on a branch, or on a raised termite mound? Are there elements in the shot that will add or subtract from the effect?
Secondly, consider the subject’s shape. Without the benefit of colour and detail on the subject, will it retain its identity to the viewer? Examples to consider are a baboon walking, where it’s shape is immediately recognised, compared to a baboon sitting hunched on a cold morning, where it will appear as a blob when detail is removed. Some subjects lend themselves to silhouettes better than others, but generally subjects on the move, or at least sitting up alert, are more effective than subjects lying down or sleeping!
Thirdly, focus the image. With strong backlight, as most silhouette shots will have, challenges the autofocus system. Photographers would usually focus on the eye of a subject, but when shooting a silhouette you are photographing the shady side of the subject and the auto-focus system may struggle to lock on. In this case, I recommend trying to focus on the “edge” of the subject, where its outline meets the background and rely on the AF system to latch on.
Finally, remember to adjust the exposure. With the advancement of photo editing suites, so much adjustment can be made after the shot has been taken. But those who prefer to get the shot right “in camera” may need to underexpose their silhouette shots to exaggerate the effect; underexposing darkens the whole image, rendering the subject black and maintaining the colour and details in the background.
For the rest of this blog post, I would like to share some examples of silhouette images, with annotations in the captions. I hope you enjoy and are able to employ this technique on your next photographic outing.
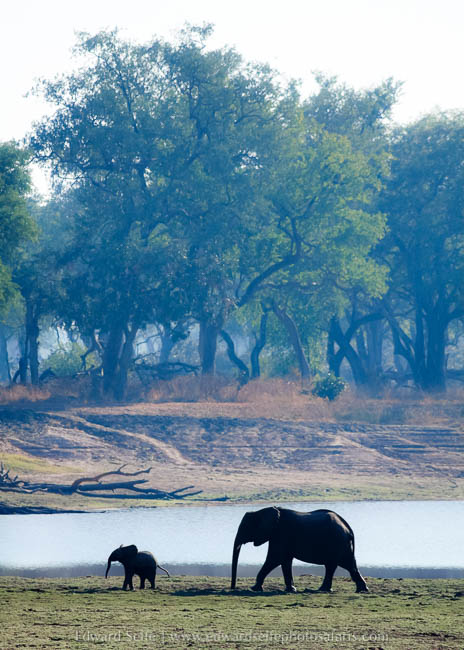
This was one of the first silhouette images I took, and it’s still one of my favourites. It shouts “Luangwa Valley” with the elephant foreground and the blue-grey leadwood trees as the backdrop. It’s not a classic silhouette, but the key elements – the elephants – are immediately recognisable because they are side on, and moving together.
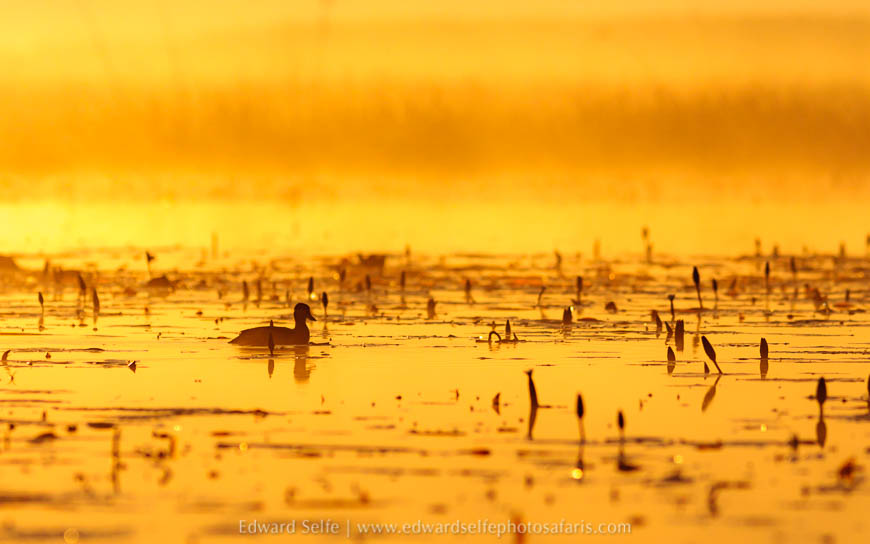
A beautiful scene, no doubt, from the flooded swamps of Bangweulu. The image nearly works very well, but the blue-billed teal is a little small in the frame, and is slightly muddled up with the lilies emerging from the surface. Had the bird been slightly closer to the camera, in one of the areas of open water, the image would have had more impact.
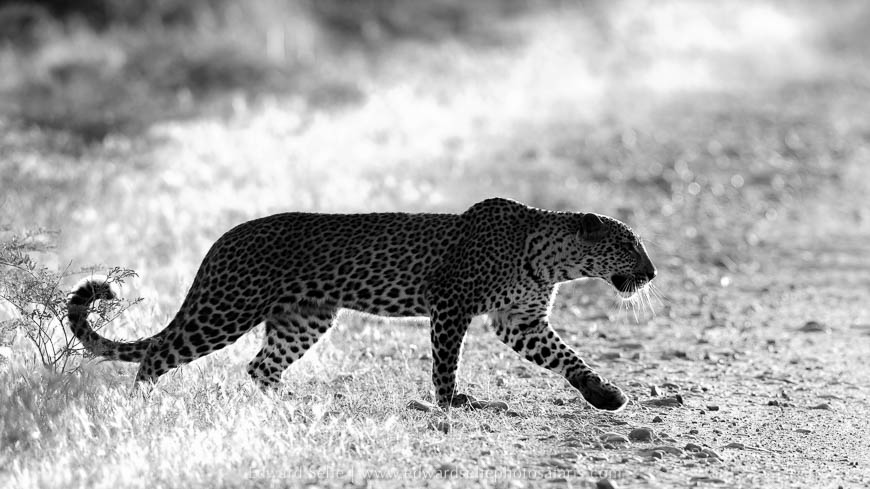
It was late morning, and I was leaving the national park, when I heard guinea fowl alarming nearby. I turned back in time to find this leopard emerging from the grass. I had little time to take the shot, but in my head, I knew that it would be a monochrome shot, as the reddish gravel would not look pleasing. The bright background rendered the subject dark, but the clear (and beautiful shape) of the leopard is clear and makes the image work.
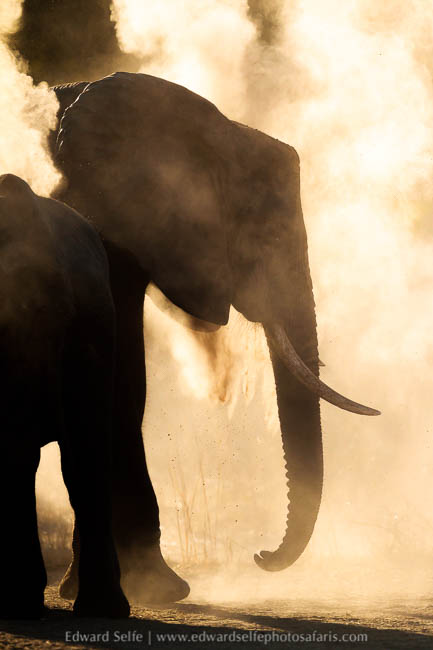
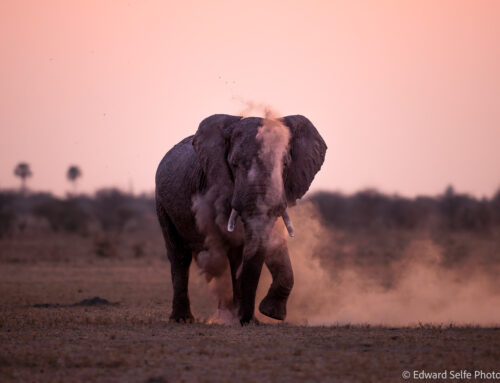
This is nearly a very nice photo! The dust, combined with the clear shape of the elephant’s chest and head makes for a great scene. On closer inspection, the rear end of another elephant crossing over with the main subject detracts from the ‘cleanness’ of the image, and repeatedly pulls the eye towards the left side of the frame. Such is the importance of the clean shape in silhouette shots.
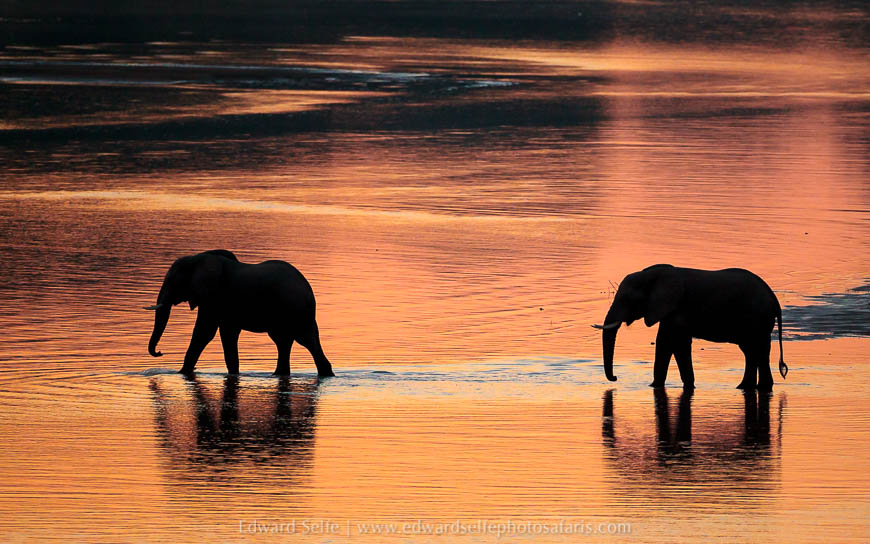
A beautiful scene from the Luangwa bridge one morning in winter, when the skies are filled with dust and the sunrises are orange and gold. Adding to the drama are some shady sandbars which don’t reflect the sunrise. This is a classic sunrise shot and there’s not much that could be improved….unless we nit-pick!
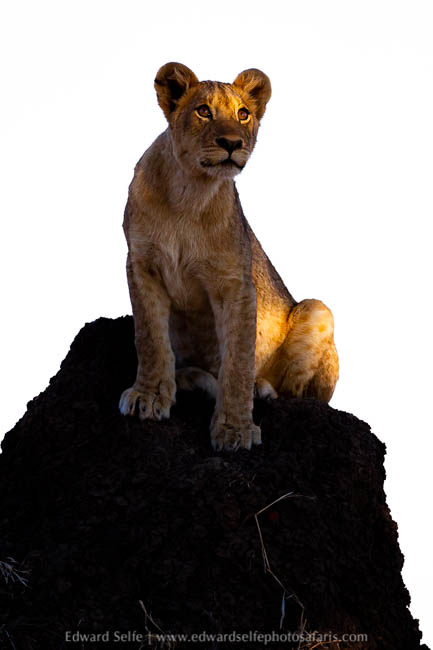
I was so excited when this young lion started to climb the termite mound. As he reached the top, I could see that the sun was hitting his face and I thought perhaps I could do something special. In fact, the harsh contrast between the dark lion and the very bright, grey, washed out sky was probably too strong, and the resulting image has a graphic-art look about it which deviates from my normal wildlife photography style.
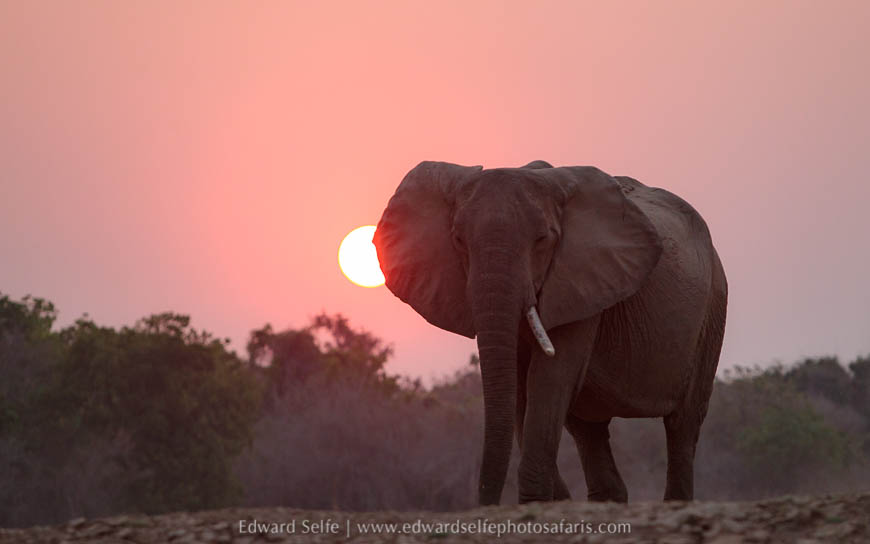
One group of safari guests really wanted to create silhouette shots. It’s not always easy to set up such situations, but we certainly tried. This one nearly worked and we used a gully to get low enough to put the sun behind the elephant…but the elephants were feeding too close to us, requiring a wide-angle lens which didn’t compress the subject and background as we would have liked. Zooming on on the elephant’s head (with the sun behind) might have worked.
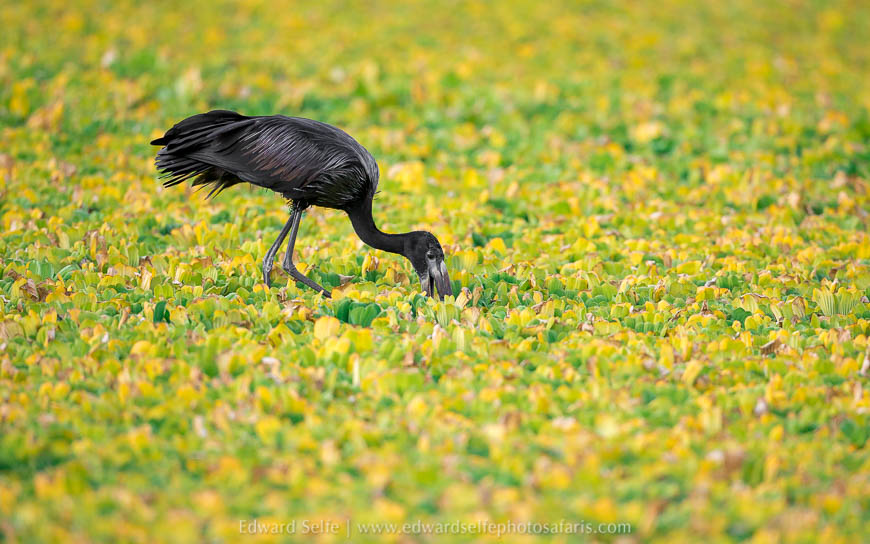
Silhouettes can also be created against areas of uniform colour, such as this openbill which was feeding on snails in a lagoon which was covered in nile cabbage. There is some detail on the bird, but even without it, the shape of the dark bird against the greenery is very pleasing.
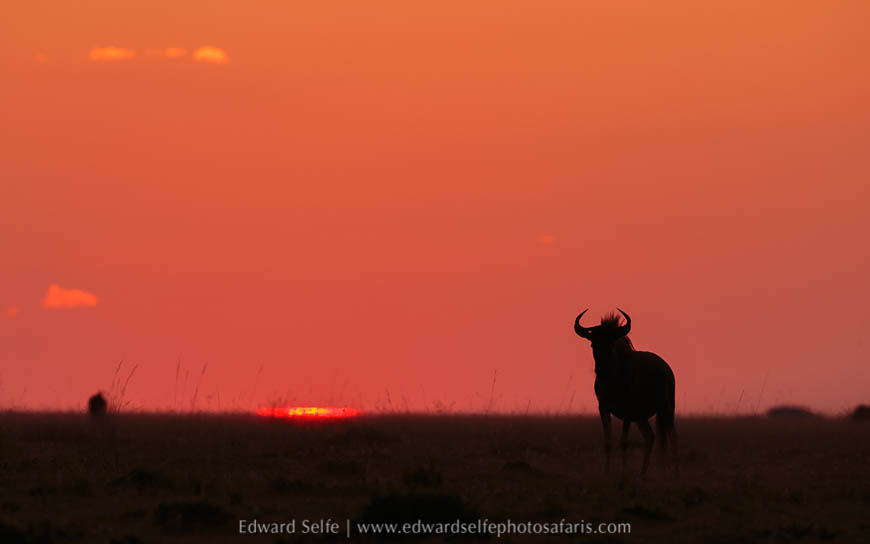
The importance of shape is shown clearly in the following two images. In the first, the wildebeest’s legs are not visible, so some of the impact is lost….
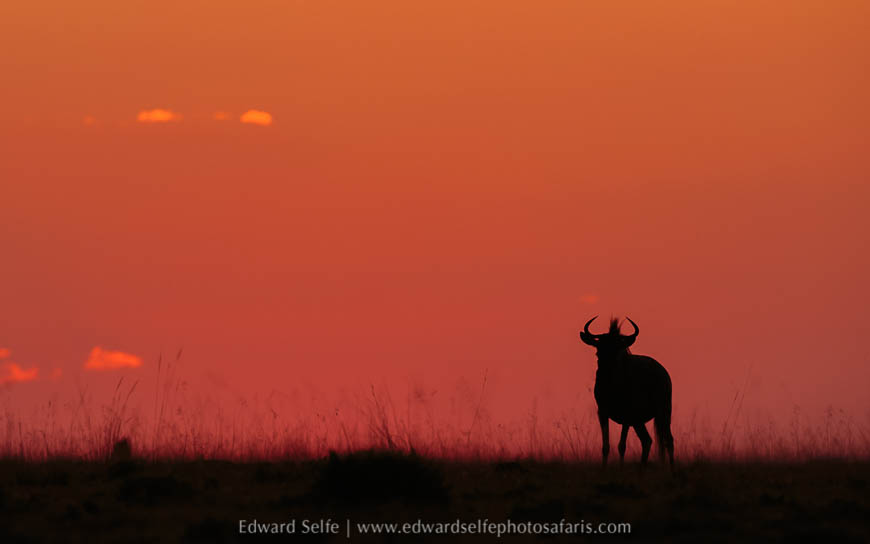
….lying on the ground, looking “up” at the wildebeest makes the subject more imposing and elevates its legs from the grass.
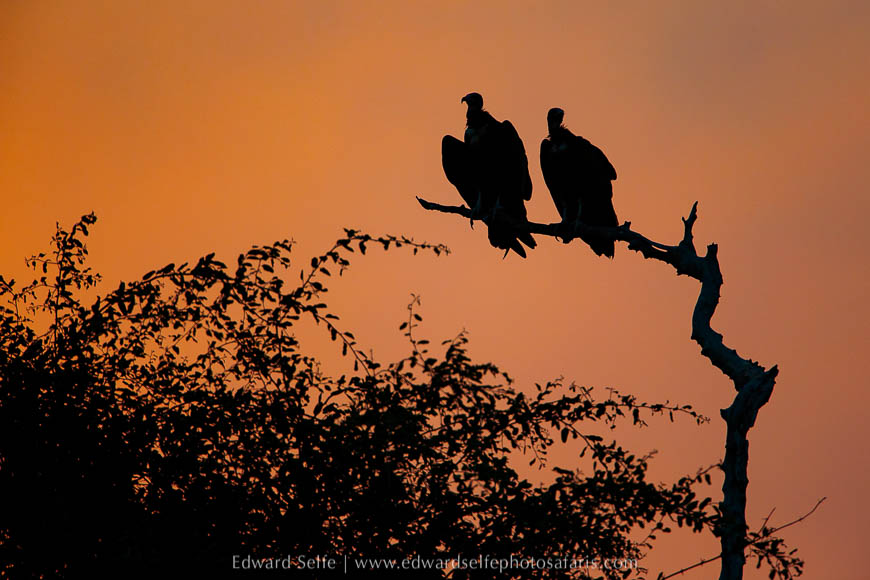
These two birds could be any species, except for the clear shape of the bill shown by the left-hand bird which identifies them as vultures…
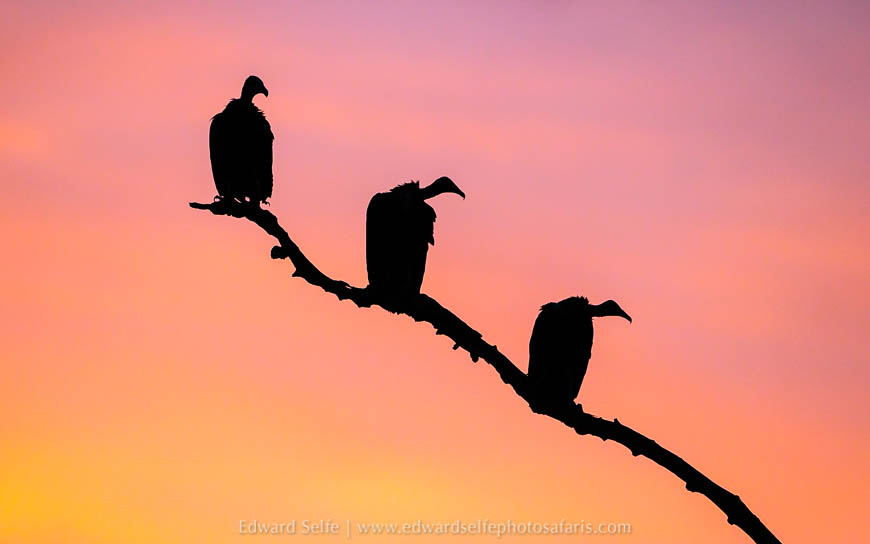
Even better is this shot where all 3 bills are showing and the vultures are in different poses. I shot this at -2.3 to darken the sky and retain the colours of sunset.
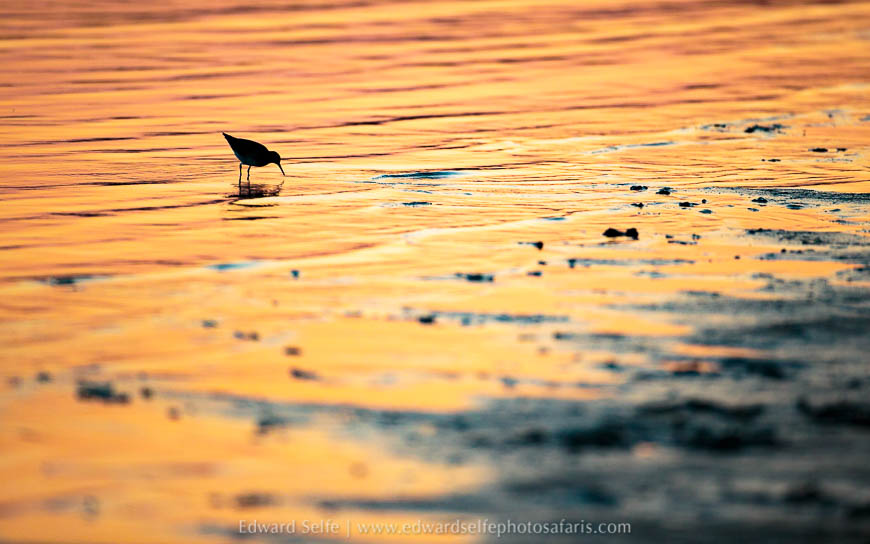
One of my all-time favourite silhouettes. I love the combination of rippling water, zig-zag bank and the well-placed sandpiper in the upper left quadrant. I took several images of this scene (at -1 exposure) to ensure I caught a moment when the bird was side on and had its bill showing.
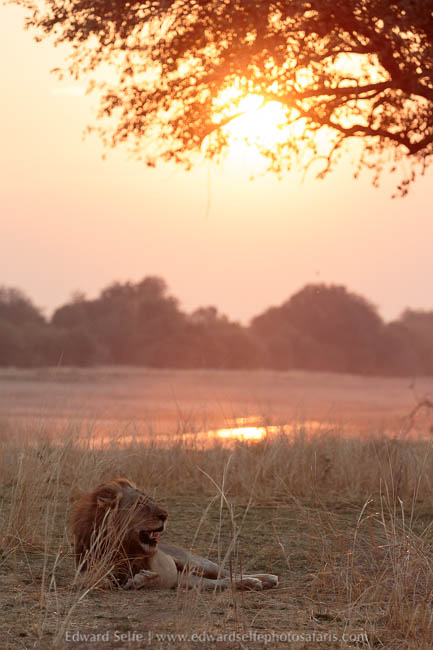
We could all see the opportunity in this scene…but the lion was not positioned in a place where we could create a silhouette. Dropping lower, if it had been possible, would have placed him against the dark trees on the opposite bank, or against the sky which would have been too bright. The ideal situation would have been to place him against the golden water, but that would have required him to be sitting on the edge of the bank, not 20m inland. Sometimes it just doesn’t work!
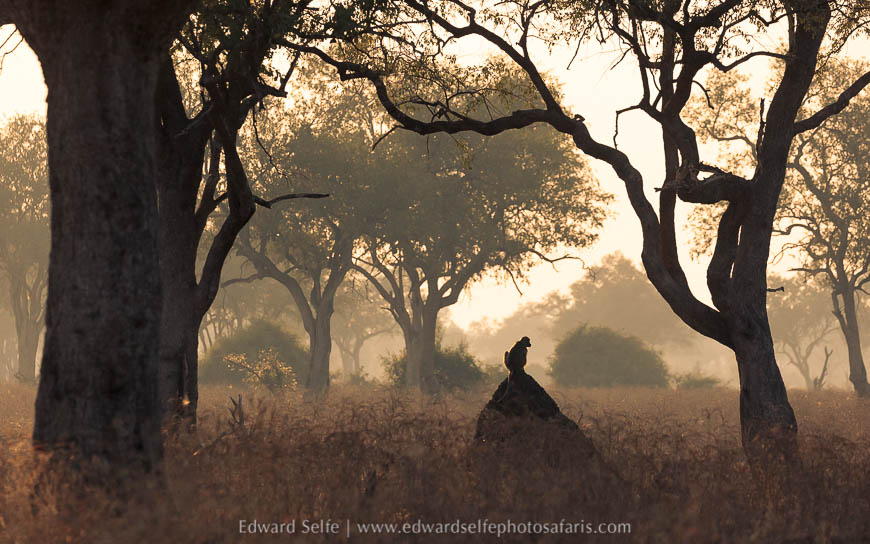
A rather unusual silhouette shot, where the subject is small in the frame and showing very little detail. Fortunately the rest of the scene is very appealing and the baboon is just large enough to be identifiable. It helps that s/he is turning towards the camera slightly.
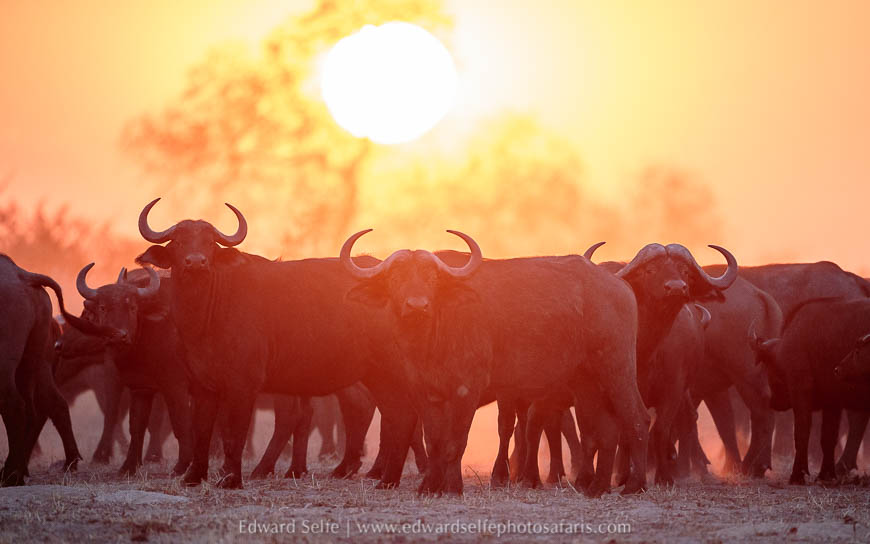
The opportunities for silhouettes with this herd of buffalo seemed outstanding and this is a very pleasing shot. But it was necessary to keep the exposure bright enough to resolve the shapes of the buffalos in the foreground, and that meant the sun was blown-out to white. Had I darkened the image, the buffalo would have blended together in a dark mass which would have been hard to resolve.
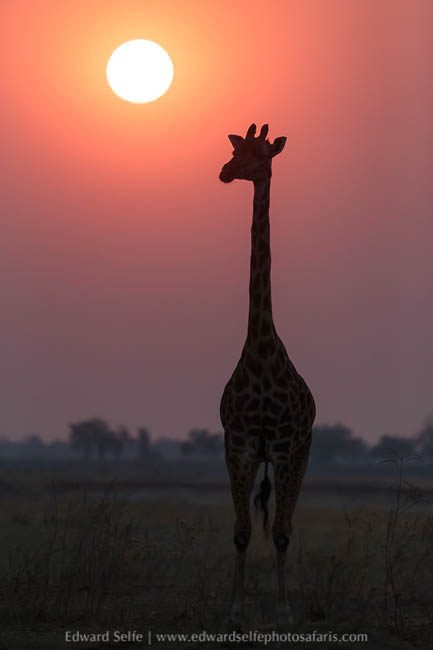
Not a total clear silhouette, but the background is sufficiently far from the giraffe to make the legs visible. The placement of the September sunset works very well.
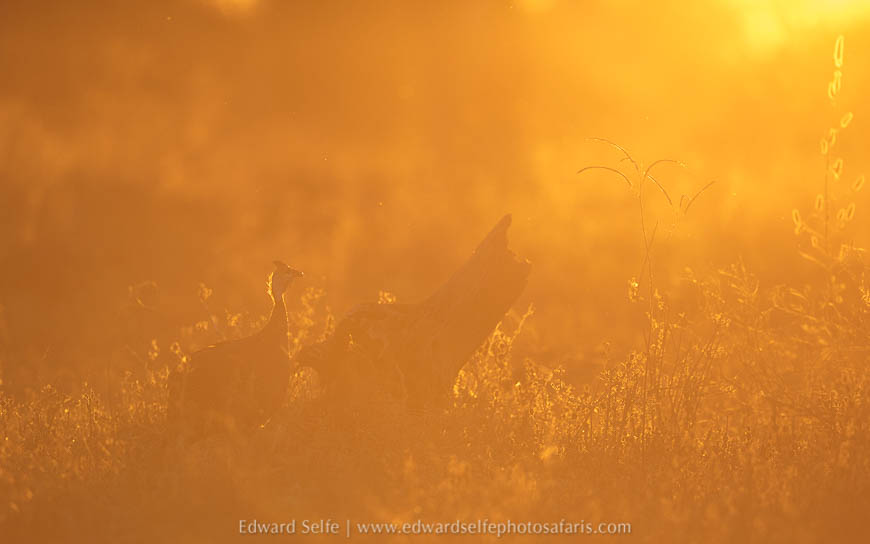
This is a shot that didn’t work out. We could see the opportunity presented by this backlit guineafowl if it jumped up onto the small stump. But it didn’t and, as such, is lost in the shrubs around it.
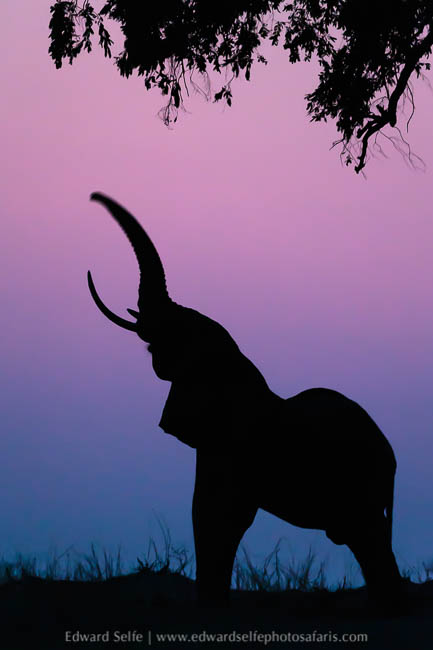
As shown by the purple sky, this shot was taken late in the evening, long after sunset. There was very little remaining light at all, indicated by the settings of 1/30sec, f5.6 and ISO 6400! However the shot was very pretty so we worked hard to get a sharp, focused image. I advised the guests to focus on the tusks where there are edges and contrast, rather than on the flank of the elephant, which was black in that light. I had to adjust focus manually to get a sharp image.
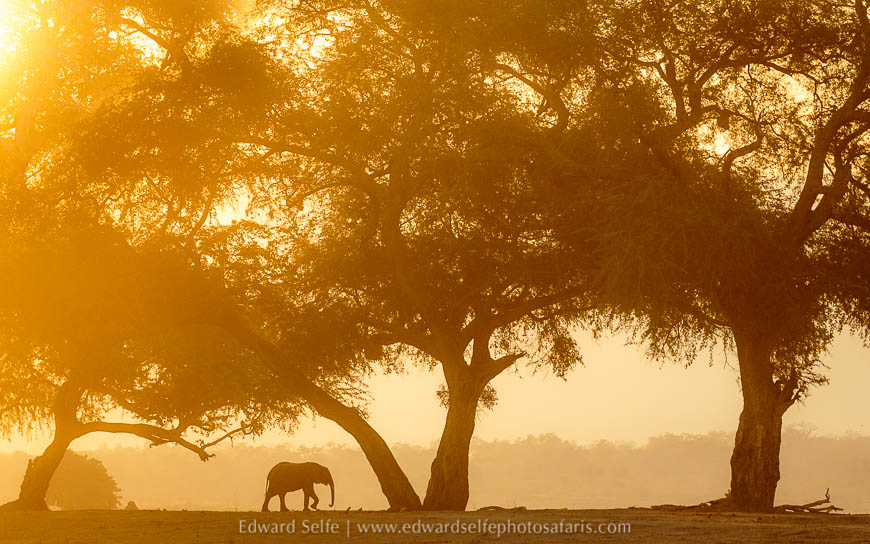
A simple, clear silhouette from Mana Pools. If you would like numerous beautiful opportunities such as this, have a look at my Mana Pools 2023 photo safari.
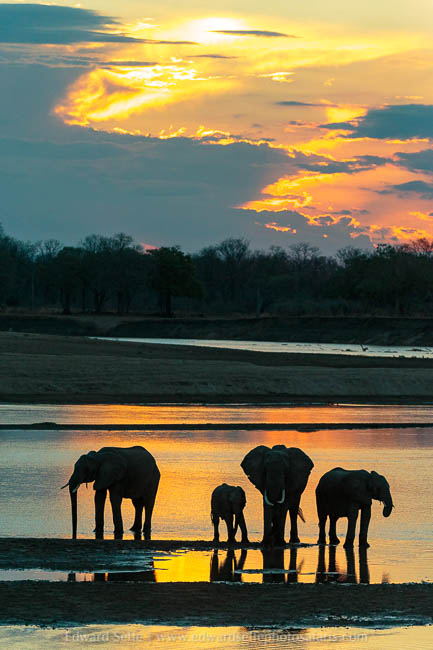
A classic silhouette shot. We found the right place, took some “banking” shots to record the moment, and then waited for the elephants to arrange themselves so that there was space between them all, and they were all looking towards us.
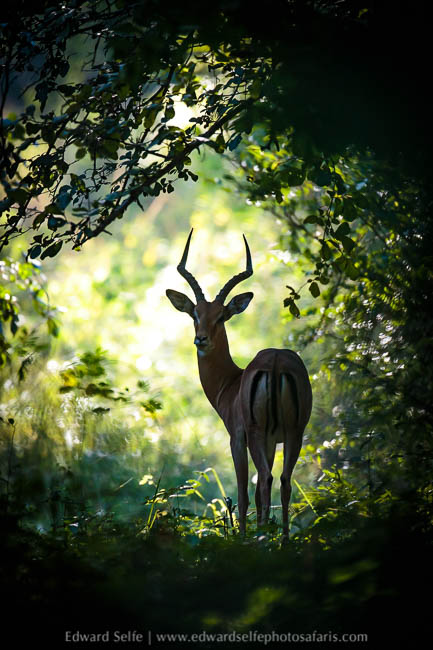
An unusual silhouette of an impala in a tunnel of trees against a very bright background. Everything about this scene says that it shouldn’t work, but by thinking differently, I captured something special. And anyway, is there anything in nature more beautiful than the shape and profile of an impala ram?
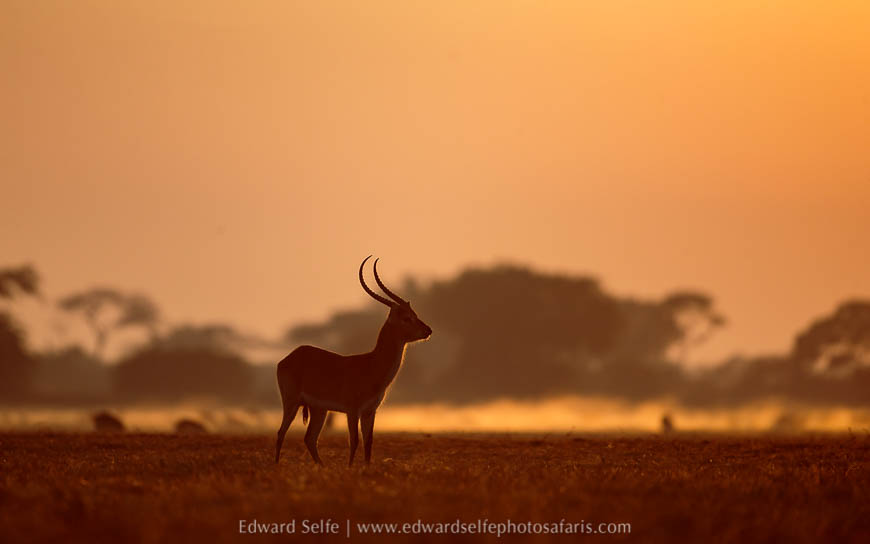
Using the layers of mist in Busanga plains to separate my subject from its background, I caught this image of a lechwe ram in the pre-sunrise light. His attention was drawn to the lions approaching nearby, so his shape was alert and beautiful.
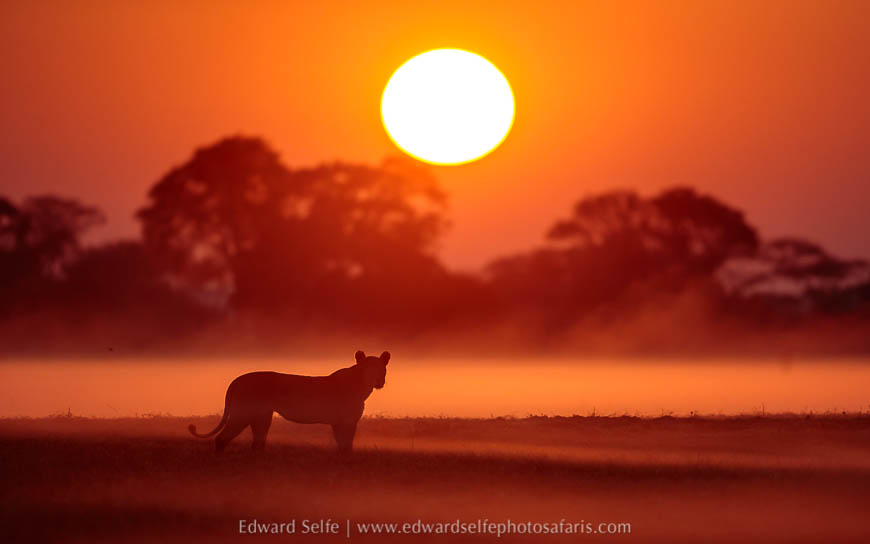
These lions staged a walk-through just as the sun rose behind a bank of mist. A minute or two earlier or later and the scene would not have worked. Sometimes, you can set everything up perfectly but you still need Nature on your side.
Thank you for reading right to the end. I hope that this has been a helpful explanation of the methods I use to create silhouettes, and I’ll be on the lookout for more situations as soon as the safari season starts again this year!

