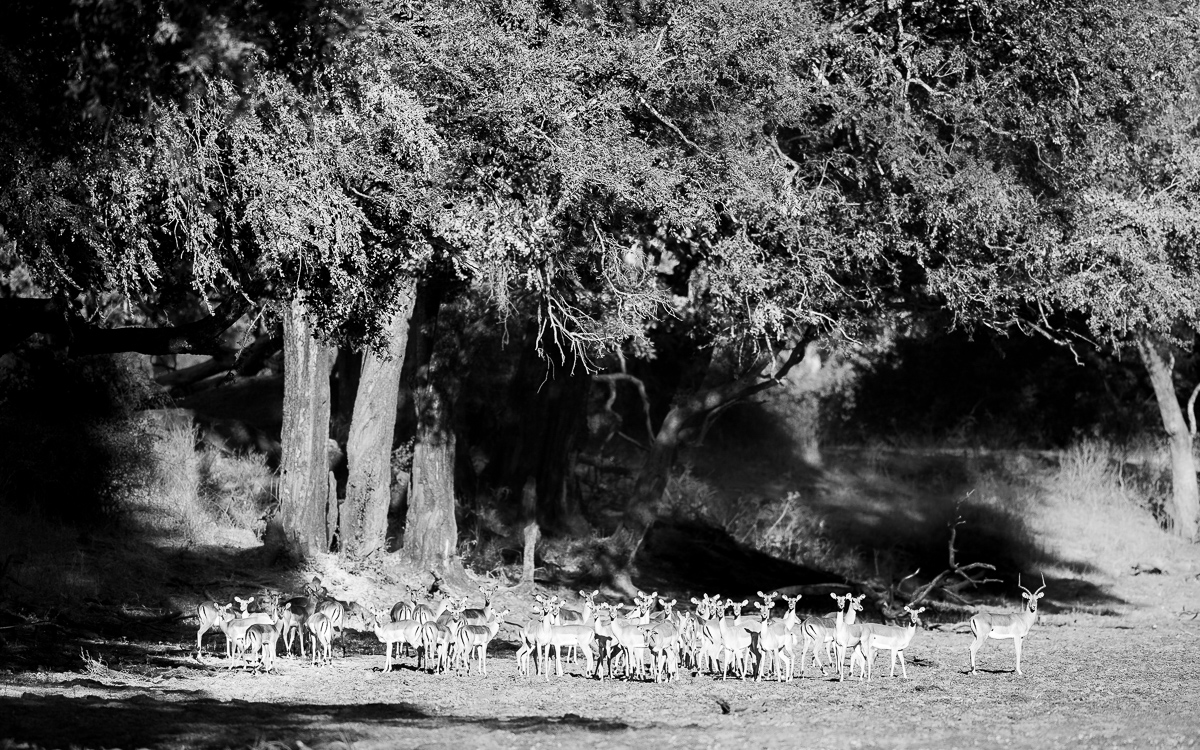
In an earlier post, I mentioned that this impalas image was my favourite from a safari in Nsefu last week. I love the arrangement of the antelopes, and the light falling across them. But there was also an element of satisfaction when the shot worked, as the bright contrasting light meant it was a tricky exposure. Let me explain by taking a look at the original shot:
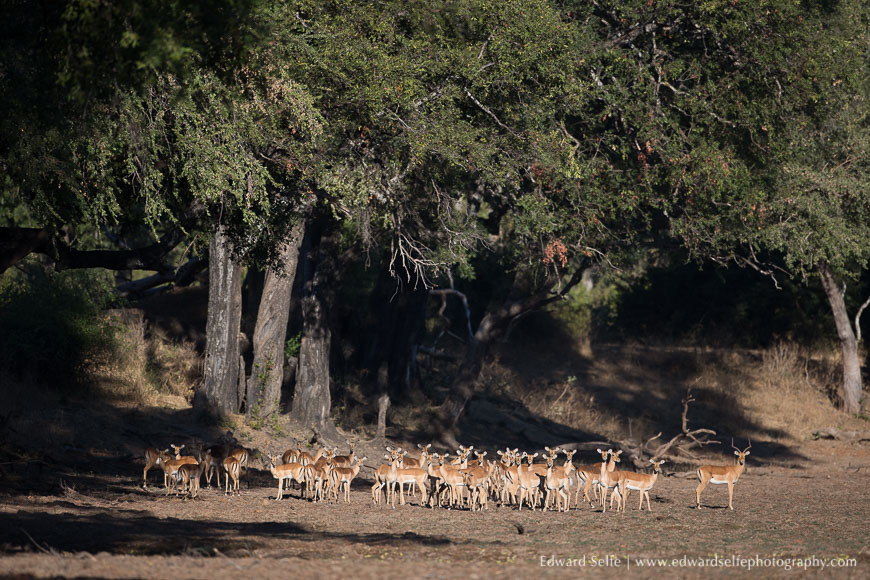
The original image shows that there is a large range of ‘tones’ – the brightness of certain areas of the image – across the scene. The impalas are brightly lit, whereas there are dark areas of shadow under the trees. This gives a challenge to the camera’s light meter and exposure calculations since there is a wider range of tones (black through to white) than the camera can capture.
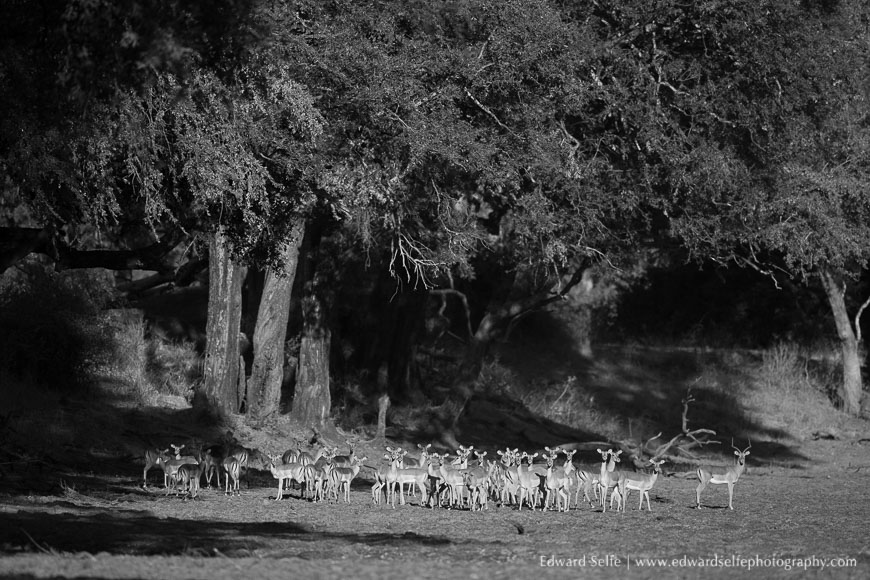
Since cameras see brightness in black and white, let’s convert the original image to black and white so that we can see what the camera saw.
When the camera looks at this scene, it measures the brightness throughout the frame (we assume here that we are using Evaluative/Matrix metering), and exposes to ensure that the average point is exactly half-way between black and white – we call this point middle-grey.
So I have added a bar down the side of the following image which is exactly middle grey – by comparing areas of the image against this benchmark, we can assess how the camera will behave.
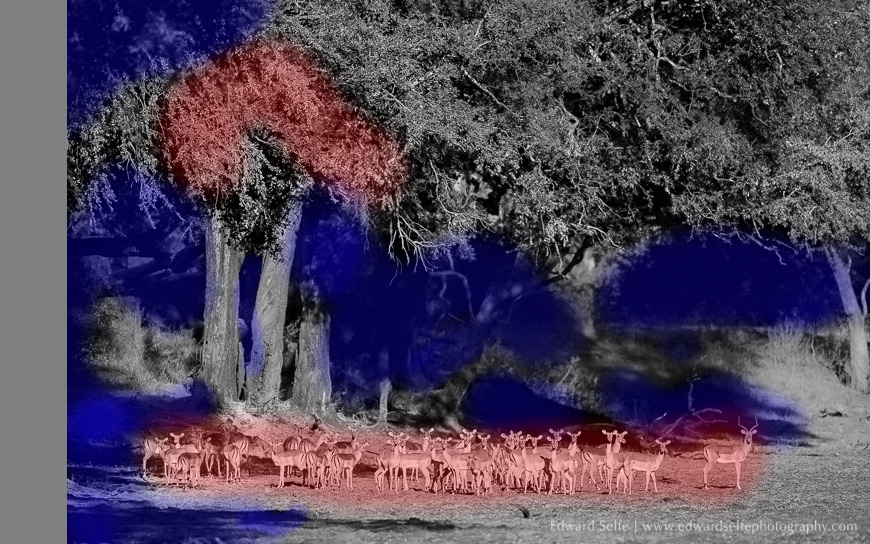
As you can easily see in my crude graphic, the area of the frame which is darker than middle grey is much larger than the area which is brighter. This means that when the camera gives us our image, the darker areas will dominate the brighter areas which will lead to an over-exposed scene.
We can combat this by under-exposing our image intentionally (as I did here) so that the shadow areas stay dark and the impalas are not too bright – after all, they are our subject and we want to ensure that they are correctly exposed!
It’s perhaps counter-intuitive to think that an image with lots of dark areas will come out too bright. But when we keep in mind that the camera will always try to set the image’s brightness to middle grey, it becomes clear.
If you would like to try this for yourself, take a photo of a piece of black paper (ensure that the image includes only the black paper). It will come out much lighter than true black. If you reverse the situation with white paper, you will see that it comes out much darker than true white!
Please ask any questions you would like to in the comments section below – I’ll get back to you straight away.
Comments