When photographing wildlife, in most cases we want our subject to create an immediate impact on the viewer. Whether we are shooting portraits which contain close up views of an elephant, or wider ‘animal-scapes’, the viewer’s eye should be drawn to the subject first of all.
There are several ways that we can do this – which include compositional techniques as well as angle of view – but this blog will look at the role of the separation of the subject from its background; and when I talk about background, I also mean any foreground details too. We can achieve this separation in three distinct way: using depth of field, colour and tone.
Depth of Field
Depth of field is the simplest to explain; by using a telephoto lens, and setting the aperture to a low/wide value, we can heavily blur the out-of-focus elements in our images. Lenses with longer focal length and/or wider apertures can achieve more of this blurring effect than ‘slower’, wider lenses. But, with careful positioning and choice of background, most telephoto lenses can create this compression/separation effect.

The best way to achieve it is to position yourself with a low angle of view towards your subject, so that the background behind the subject is the surroundings, not the ground below. Positioning 50m away from the subject and using your lens at 500mm is preferable to being 10m away from the subject and using the lens at 100mm. The more distant the background behind the subject, the more blurred it will become. In this case, the low angle of view towards these African Skimmers, and the far distant background has created a shot where the birds are extremely sharp in an otherwise out of focus surroundings.

This Shoebill was standing in tall grass; getting very low in the boat and shooting with a wide aperture (f4) and a long lens (500mm) rendered everything in front and behind the bird into a blurred green frame. This has created a very high impact image of this lovely bird.
Colour
Subjects can be set off beautifully against a carefully selected background colour. Orange and red subjects look great against green; and blue & black subjects look good against yellow. Generally, complementary colours work well so it’s interesting to play with this idea. Careful choice of positioning creates different coloured backgrounds, depending on the environment that you place behind the subject.

The soft green background behind this Woodland Kingfisher shows off the bird’s exquisite powder blue feathers and red bill. In the case of this blue bird, a yellow background would also work, but using the blue of the sky would likely not show the bird at its best.

Orange and green are highly complementary colours, as is well illustrated in this image of a leopard lounging in the boughs of a Sausage Tree. Placing the leopard partially behind the green leaves helps to add a sense of depth to the image.
Tone
Perhaps my favourite method of separating subject from background is to use a tone differential, where there are striking differences in brightness across the frame. This doesn’t require expensive, fast lenses, or impressive subjects, but can be achieved through careful placement of subject and background. By lining up your subject with a background that is tonally different you can create an impressive image.

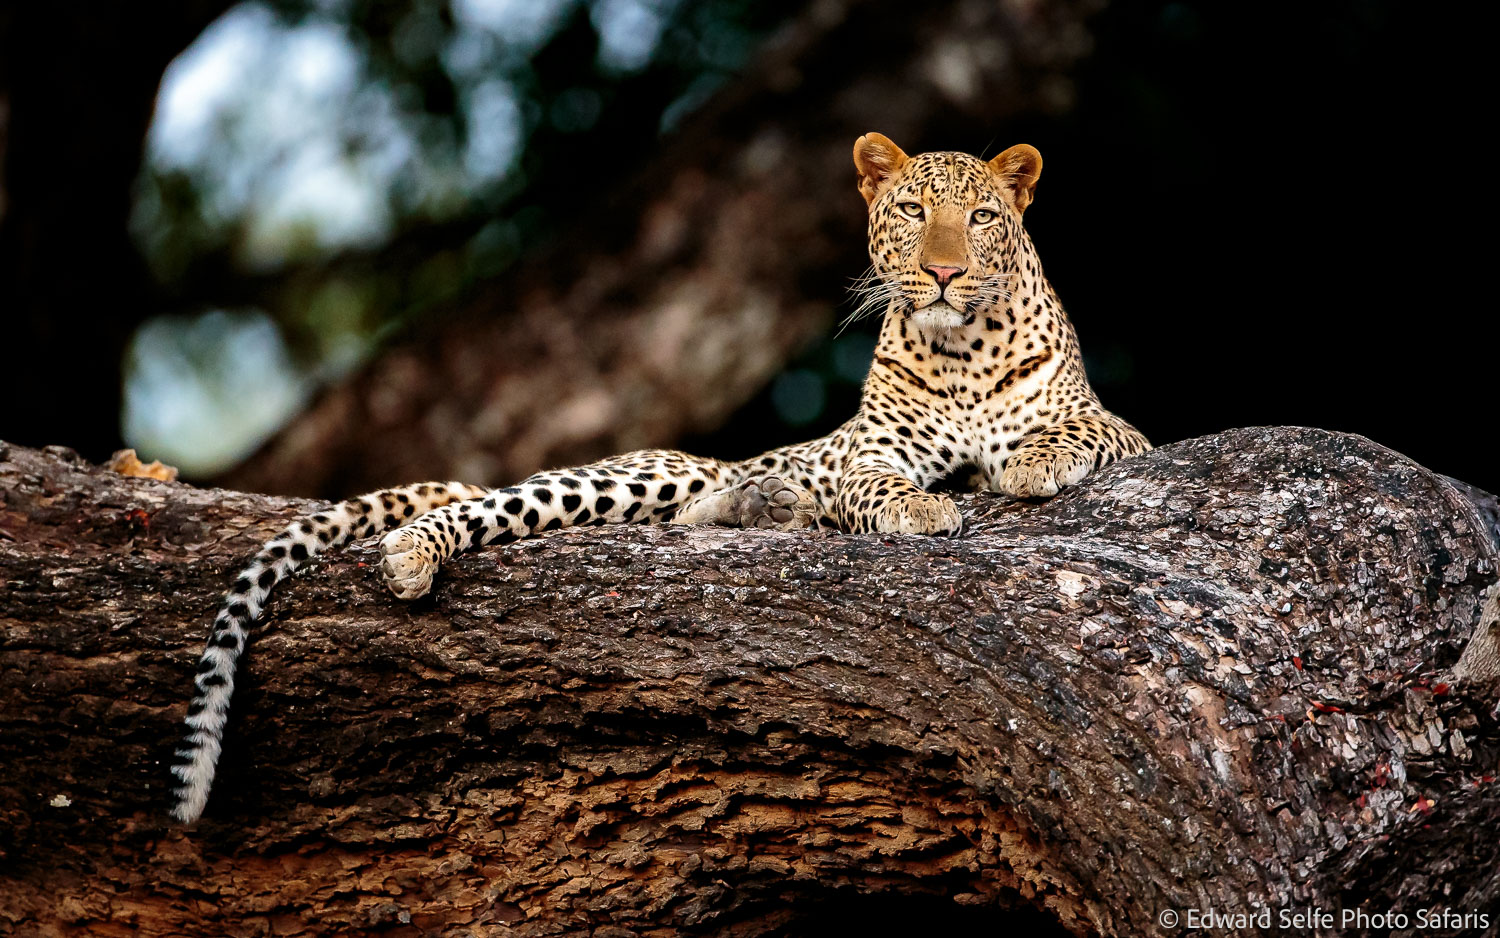
A superb sighting of a leopard on a fallen tree, made all the more special by the sharply contrasting background. Choosing to underexpose this image kept the background dark and prevented the leopard becoming too bright.

Based on a similar theme as the leopard above, the bright light hitting these bee-eaters sets them off in stark contrast to the underside of the shady tree behind. It’s a simple shot of two birds on a branch, but the lighting makes it special. Shot at -2 exposure compensation.

In this case, it is the key features of the chimp’s face which are the brighter areas, and the rest of the chimp is much darker. In fact, looking for such moments in the forests of Uganda is the best way to capture images of chimps….but be careful to lower the exposure (often to -3) to keep the ISO low and avoid burning out the shiny facial skin.

It also works to reverse the tonal differential, creating silhouettes to separate the subject from the background. In this case, the pale, backlit orange mist created a striking backdrop for the lioness as she crossed the sunrise.
Thank you for reading about this topic; it’s a subject that is important to me as I like to create images where the subject is immediately apparent without simply always relying on a long lens and a shallow depth of field, helpful as this is on many occasions. I look forward to sharing these ideas with you on safari some day.
Leave A Comment